I love Halloween and I love finding new things to make! A few weeks ago I came across a blog called "Sugar Plum Delights" and fell in love with this idea to make Halloween Luminaries! The project was simple but very messy! The main reason why it was messy is because I used too much Modge Podge and did not allow for enough dry time in between the layers of tissue paper; however the end result still turned out great!
For this project, I needed different colors of tissue paper, Modge Podge, 3 glass jars, a lighting source and 3 Halloween designs for the front of the jar which I used vinyl to adhere to the jar.
The first step is to cut the tissue paper to the approximate height and width of the jar. Then brush on a thin layer of Modge Podge onto the entire jar. Quickly, wrap the tissue paper onto the jar before the Modge Podge dries. The picture below shows the jars with one layer of tissue paper attached to the jar.
Now, after the tissue paper is on and the Modge Podge has had a chance to dry, apply a second layer of Modge Podge over the tissue paper. Then wrap a second layer of tissue paper on the jar. Once that dries, you can apply the Halloween design onto the jar. I used vinyl but one could paint a design, cut out construction paper and glue it on or I'm sure there are many other possibilities. Once the design is on, add a couple more layers of Modge Podge to the jar. This will provide a nice shiny finish and protect it from rain, snow or any other outside elements. The picture below shows the jars drying upside down (only way I could figure out how to do it without having the Modge Podge stick to the table).
And here are the finished Halloween Luminaries!
I do not have the lights in them which you wouldn't be able to see anyway since it's too light out. Battery operated Candle Votives work but I would prefer more light for the darker colored jars. I also found some battery operated lights that I placed upside down onto the top of the jar from Walgreens. It was a package of 3 LED puck lights from First Alert for $5 and these provide much more light! The back of it looks like a lid on the jar which finishes off the entire look. I tried to take a picture of that in the dark but it didn't turn out, I'll play around with that and if I get it to work I'll post another picture.
Welcome to my Website! In addition to creating and selling my products, I love to try new ideas, many of which will be showcased in my blog found on the Home page! Check back often for new blogs and new items I will have for sale! Need something designed but do not see it in my catalog listed under the Vinyl Templates tab? I can custom design nearly anything, please contact me and we may be able to create a wonderful product based on your ideas! -- Cindy
Custom Super Hero Valance
Lately, a good portion of my projects have been to convert my son's bedroom from a Disney Cars room to a Super Hero room. I decided to create a custom valance for the room made out of styrofoam. The only reason I knew that this is possible to do is from a very good friend of mine, Ali, who is so creative and inspiring. She had created custom valances for every window in her house out of stryofoam so I had to try it out.
I did not take pictures while creating the valance but will be working on another valance very soon and will ensure pictures are taken then. But, it is relatively simple to do especially if you have an extra set of hands to help. I went back to my very creative and inspiring friend, Ali, for tips and what "not to do" and also used this website for a step by step tutorial. I used 1/2 inch thick styrofoam and then went to Michael's to find some glue that will work specifically for stryofoam as most glues will "eat it". Toothpicks, T-pins, tape, a stapler, batting and fabric is the rest of my supply list.
When putting the pieces together we did a very thin line of glue and then inserted toothpicks to secure the pieces of foam together. That was it, after letting it sit for maybe 30 minutes we wrapped the stryofoam with batting which I actually secured with clear, mover's tape. When attaching the fabric, we secured it with T-pins but then also the stapler. The hardest part was the corners, wrapping it so no bulges appeared. Realistically, the stapler was not needed and on my second canvas, we did not use the stapler at all. I don't think it matters either way, my thought process was by only securing with T-pins it would be easier to remove the fabric and re-wrap when you wanted a new look. However, you could just wrap new fabric over the existing fabric too so I think either way is fine. And, I even went up to 1 inch thick stryofoam now to test on the third valance that I will be completing very soon. I doubt it will make any difference but just wanted to see for myself.
My final super hero custom valance is now complete and my son loves it!
To the right of the Superman valance is a canvas of Spiderman. That is also made out of stryofoam and you can read all about it on the blog right below this one! : )
I did not take pictures while creating the valance but will be working on another valance very soon and will ensure pictures are taken then. But, it is relatively simple to do especially if you have an extra set of hands to help. I went back to my very creative and inspiring friend, Ali, for tips and what "not to do" and also used this website for a step by step tutorial. I used 1/2 inch thick styrofoam and then went to Michael's to find some glue that will work specifically for stryofoam as most glues will "eat it". Toothpicks, T-pins, tape, a stapler, batting and fabric is the rest of my supply list.
When putting the pieces together we did a very thin line of glue and then inserted toothpicks to secure the pieces of foam together. That was it, after letting it sit for maybe 30 minutes we wrapped the stryofoam with batting which I actually secured with clear, mover's tape. When attaching the fabric, we secured it with T-pins but then also the stapler. The hardest part was the corners, wrapping it so no bulges appeared. Realistically, the stapler was not needed and on my second canvas, we did not use the stapler at all. I don't think it matters either way, my thought process was by only securing with T-pins it would be easier to remove the fabric and re-wrap when you wanted a new look. However, you could just wrap new fabric over the existing fabric too so I think either way is fine. And, I even went up to 1 inch thick stryofoam now to test on the third valance that I will be completing very soon. I doubt it will make any difference but just wanted to see for myself.
My final super hero custom valance is now complete and my son loves it!
Custom Super Hero Canvases
This is a personal project I have been working on for my 5 year old boy who is in love with Superheros! For the past 3 years his room was decorated with Disney Cars and as part of that decoration, my husband built a big frame and we wrapped it with a panel of fabric that was of Tow Mater and Lightning McQueen. This simple and very inexpensive project was my FAVORITE piece of the entire room. So I was a little sad on having to transition his room into Superheros and thus losing this custom piece until I realized that I can easily change it by re-wrapping it into a Superhero canvas!
The only reason we had to redecorate my son's room is because he outgrew his twin size bed and we upgraded to a full-size bed. So when shopping for a new bedspread my son had to have 6 different Superheros on it! And believe me...finding a bedspread with Incredible Hulk, the Thing, Wolverine, Captain Amercia, Spiderman and several others on it was almost impossible. However, Bed Bath & Beyond was my hero and literally the day I found this bedspread with bedsheets and extra pillow cases/shams, I received a 20% coupon in my inbox! Perfect timing!
Now I'm back to redecorating his room and wanting to fill it with as many unique and custom Superhero pieces as possible. I still plan on buying a few wall stickers of the Superheros; however, for now I am working on many different projects to provide a personalized room that fits my son and will last for many years. Back to that custom piece my husband helped me with in the Disney Cars room...well this is what the piece looked like:
I purchased a panel of fabric at Hobby Lobby on sale for under $5 and my husband built the frame. We then attached poster board on the front of the frame for added support. For under $10 we had a huge piece of art that was so vibrant and sharp looking! The picture does not do it justice. Now, all of the Cars stickers are gone and a new, bigger bed is in the room so we need to redecorate. I went searching for new Superhero panels of fabric that would work and found several on Ebay. We decided to use Batman since that was one of the Superheros not included on the bedspread and we now have this new piece of art!
As you can tell, we rotated the canvas for Batman and it looks super sharp! The problem is that we really now need 2 pieces of art at this size because of where we had to hang Batman. So back to Ebay I went and I found Spiderman! But now I need to ask my husband to build another frame.....except for I came up with an even better idea! Instead of building one...I decided to go to Home Depot and buy a 4 x 8 foot piece of 1 1/2 inch thick sheet of stryofoam. This cost about $14 and I had the guy cut it to the exact dimensions of Batman for free! I did not waste the rest of the styrofoam as that is for a different project that I will post soon.
Now with this super light-weight piece of styrofoam I wrapped Spiderman around it and secured it with t-pins. So the back of the artwork looks like this:
You cannot even tell that one is framed out of wood and the other is stryofoam...unless if you lifted them as the weight difference is significant! And here are the 2 pieces of art in my son's room on the opposite wall from where the Disney Cars sign used to hang. I still need to put something under my son's name but I wanted to show how it looked on the wall.
I apologize for such a long post but this is so cheap and easy to do and the finished project really stands out in a room. I have found that the easiest way to search for something and to find items that you would not find in your local store is to search for "panel fabric" plus whatever specific theme you are looking for as both Batman and Spiderman come in the exact same size, as well as the Disney Cars one I had previously made.
The only reason we had to redecorate my son's room is because he outgrew his twin size bed and we upgraded to a full-size bed. So when shopping for a new bedspread my son had to have 6 different Superheros on it! And believe me...finding a bedspread with Incredible Hulk, the Thing, Wolverine, Captain Amercia, Spiderman and several others on it was almost impossible. However, Bed Bath & Beyond was my hero and literally the day I found this bedspread with bedsheets and extra pillow cases/shams, I received a 20% coupon in my inbox! Perfect timing!
Now I'm back to redecorating his room and wanting to fill it with as many unique and custom Superhero pieces as possible. I still plan on buying a few wall stickers of the Superheros; however, for now I am working on many different projects to provide a personalized room that fits my son and will last for many years. Back to that custom piece my husband helped me with in the Disney Cars room...well this is what the piece looked like:
I purchased a panel of fabric at Hobby Lobby on sale for under $5 and my husband built the frame. We then attached poster board on the front of the frame for added support. For under $10 we had a huge piece of art that was so vibrant and sharp looking! The picture does not do it justice. Now, all of the Cars stickers are gone and a new, bigger bed is in the room so we need to redecorate. I went searching for new Superhero panels of fabric that would work and found several on Ebay. We decided to use Batman since that was one of the Superheros not included on the bedspread and we now have this new piece of art!
As you can tell, we rotated the canvas for Batman and it looks super sharp! The problem is that we really now need 2 pieces of art at this size because of where we had to hang Batman. So back to Ebay I went and I found Spiderman! But now I need to ask my husband to build another frame.....except for I came up with an even better idea! Instead of building one...I decided to go to Home Depot and buy a 4 x 8 foot piece of 1 1/2 inch thick sheet of stryofoam. This cost about $14 and I had the guy cut it to the exact dimensions of Batman for free! I did not waste the rest of the styrofoam as that is for a different project that I will post soon.
Now with this super light-weight piece of styrofoam I wrapped Spiderman around it and secured it with t-pins. So the back of the artwork looks like this:
To hang the stryofoam I found a product from Walmart called Command by 3M. It is like velcro but will not damage your walls when you remove and was super easy and cheap to use. Just place one piece on the canvas and the adjacent piece on the wall, just like how velcro would work. And Spiderman next to Batman looks like this:
You cannot even tell that one is framed out of wood and the other is stryofoam...unless if you lifted them as the weight difference is significant! And here are the 2 pieces of art in my son's room on the opposite wall from where the Disney Cars sign used to hang. I still need to put something under my son's name but I wanted to show how it looked on the wall.
I apologize for such a long post but this is so cheap and easy to do and the finished project really stands out in a room. I have found that the easiest way to search for something and to find items that you would not find in your local store is to search for "panel fabric" plus whatever specific theme you are looking for as both Batman and Spiderman come in the exact same size, as well as the Disney Cars one I had previously made.
Skateboarder - Vinyled
I must say, I was so looking forward to school starting so I would have more time to work on my projects and now.....I have not had a single post in a MONTH! Since school has started, life has become a BLUR!!! I have one boy in Kindergarten which is 5 full days a week and my other boy is in preschool, 2 mornings a week so I feel like I'm either dropping kids off or picking them up all of the time! I have 3 hours twice a week to just myself and I have been able to do tons of shopping for my projects that I could never do with my kids so I have achieved part of my goal...now I must focus on posting, posting, posting!!!!
This post is a special dedication to one of my favorite friends, Ali, who used to live in the same town as me. In fact, her daughter was in my son's preschool class and that's how we originally met! Well, the first time we formally met was when my vehicle was stuck in the snow in the school parking area and she helped to push me out! : ) But that's another story for another time! Anyway, due to job changes, they moved back to Michigan where they originally lived, it has not been long since they left but it feels like forever. When they did live by us, I had made a vinyl sign of a skateboarder with a quote by Tony Hawk for her son's bedroom.
When the family was moving to Michigan, Ali asked me to make another sign of the skateboarder for her son's room in their new house. This time, she came up with a fantastic idea that made the sign 1,000 times better for just a few dollars. This is the sign in the new bedroom in Michigan!
I had to ask how she created this and the idea is so SIMPLE! Ali painted the wall white, a big square of white right on the wall. Then her husband made the frame by using floor trim and they just attached it to the wall. Then Ali transferred the skateboarder on the wall, just like normal but now it looks like a very expensive, custom art piece! This idea is so inexpensive and easy and worth a million bucks that I'm stealing it for my house! The only other difference of the two bedrooms is the bedspread color has changed but what a difference a little bit of paint and a home-made frame makes!
And how SAD is this??? I haven't posted in a month....and my first posting is of my friend's AWESOME idea!!!! I have some projects completed to post and they will be up very shortly, I just need to take some pictures first. The next post will be my own project I promise!
Cindy
This post is a special dedication to one of my favorite friends, Ali, who used to live in the same town as me. In fact, her daughter was in my son's preschool class and that's how we originally met! Well, the first time we formally met was when my vehicle was stuck in the snow in the school parking area and she helped to push me out! : ) But that's another story for another time! Anyway, due to job changes, they moved back to Michigan where they originally lived, it has not been long since they left but it feels like forever. When they did live by us, I had made a vinyl sign of a skateboarder with a quote by Tony Hawk for her son's bedroom.
And here is the sign on the wall above her son's bed!
When the family was moving to Michigan, Ali asked me to make another sign of the skateboarder for her son's room in their new house. This time, she came up with a fantastic idea that made the sign 1,000 times better for just a few dollars. This is the sign in the new bedroom in Michigan!
I had to ask how she created this and the idea is so SIMPLE! Ali painted the wall white, a big square of white right on the wall. Then her husband made the frame by using floor trim and they just attached it to the wall. Then Ali transferred the skateboarder on the wall, just like normal but now it looks like a very expensive, custom art piece! This idea is so inexpensive and easy and worth a million bucks that I'm stealing it for my house! The only other difference of the two bedrooms is the bedspread color has changed but what a difference a little bit of paint and a home-made frame makes!
And how SAD is this??? I haven't posted in a month....and my first posting is of my friend's AWESOME idea!!!! I have some projects completed to post and they will be up very shortly, I just need to take some pictures first. The next post will be my own project I promise!
Cindy
Back to School Time Part 2
Last week my oldest son started Kindergarten and I decorated his water bottle and pencil box. This week my youngest will be starting preschool! A water bottle was not on the required supply list but a pencil box is so I have one more simple project to complete to personalize Kevin's new pencil box.
Kevin picked out the colors and I helped find some images that capture Kevin's current interests! I found a silhouette of Mickey Mouse - Kevin's favorite TV show and then another image of a gecko. I don't think Kevin has actually seen a gecko other then maybe the zoo but he loves the pictures of geckos and other creatures of that size.
Kevin's new pencil box is now ready for Preschool!
Kevin picked out the colors and I helped find some images that capture Kevin's current interests! I found a silhouette of Mickey Mouse - Kevin's favorite TV show and then another image of a gecko. I don't think Kevin has actually seen a gecko other then maybe the zoo but he loves the pictures of geckos and other creatures of that size.
Kevin's new pencil box is now ready for Preschool!
Back To School Time
These 2 projects were very simple but something that I wanted to do for my oldest boy who is starting Kindergarten TOMORROW! This is a new adventure for the whole family starting with Back To School Supplies to buy, clothes shopping, packing lunches and not having my boy for 5 full school days every week!
When looking at the required school supply list, every item required the students' names on them in permanent ink. I'm fine with doing that for the boxes of crayons, glue sticks, etc... but when it came to my son's pencil box and water bottle I wanted to make it a little more special for him. Again, just a very simple project but by just adding his name in vinyl instead of permanent ink I think the items look much nicer! And...even though there is only "one" Brady in his Kindergarten class, my son still insists on being called "Brady M" which was his name in preschool since that class did have more then one Brady in it! He is very adamant of this name as we even have had to put that on his Birthday cake, cards, signs for his bedroom, etc...
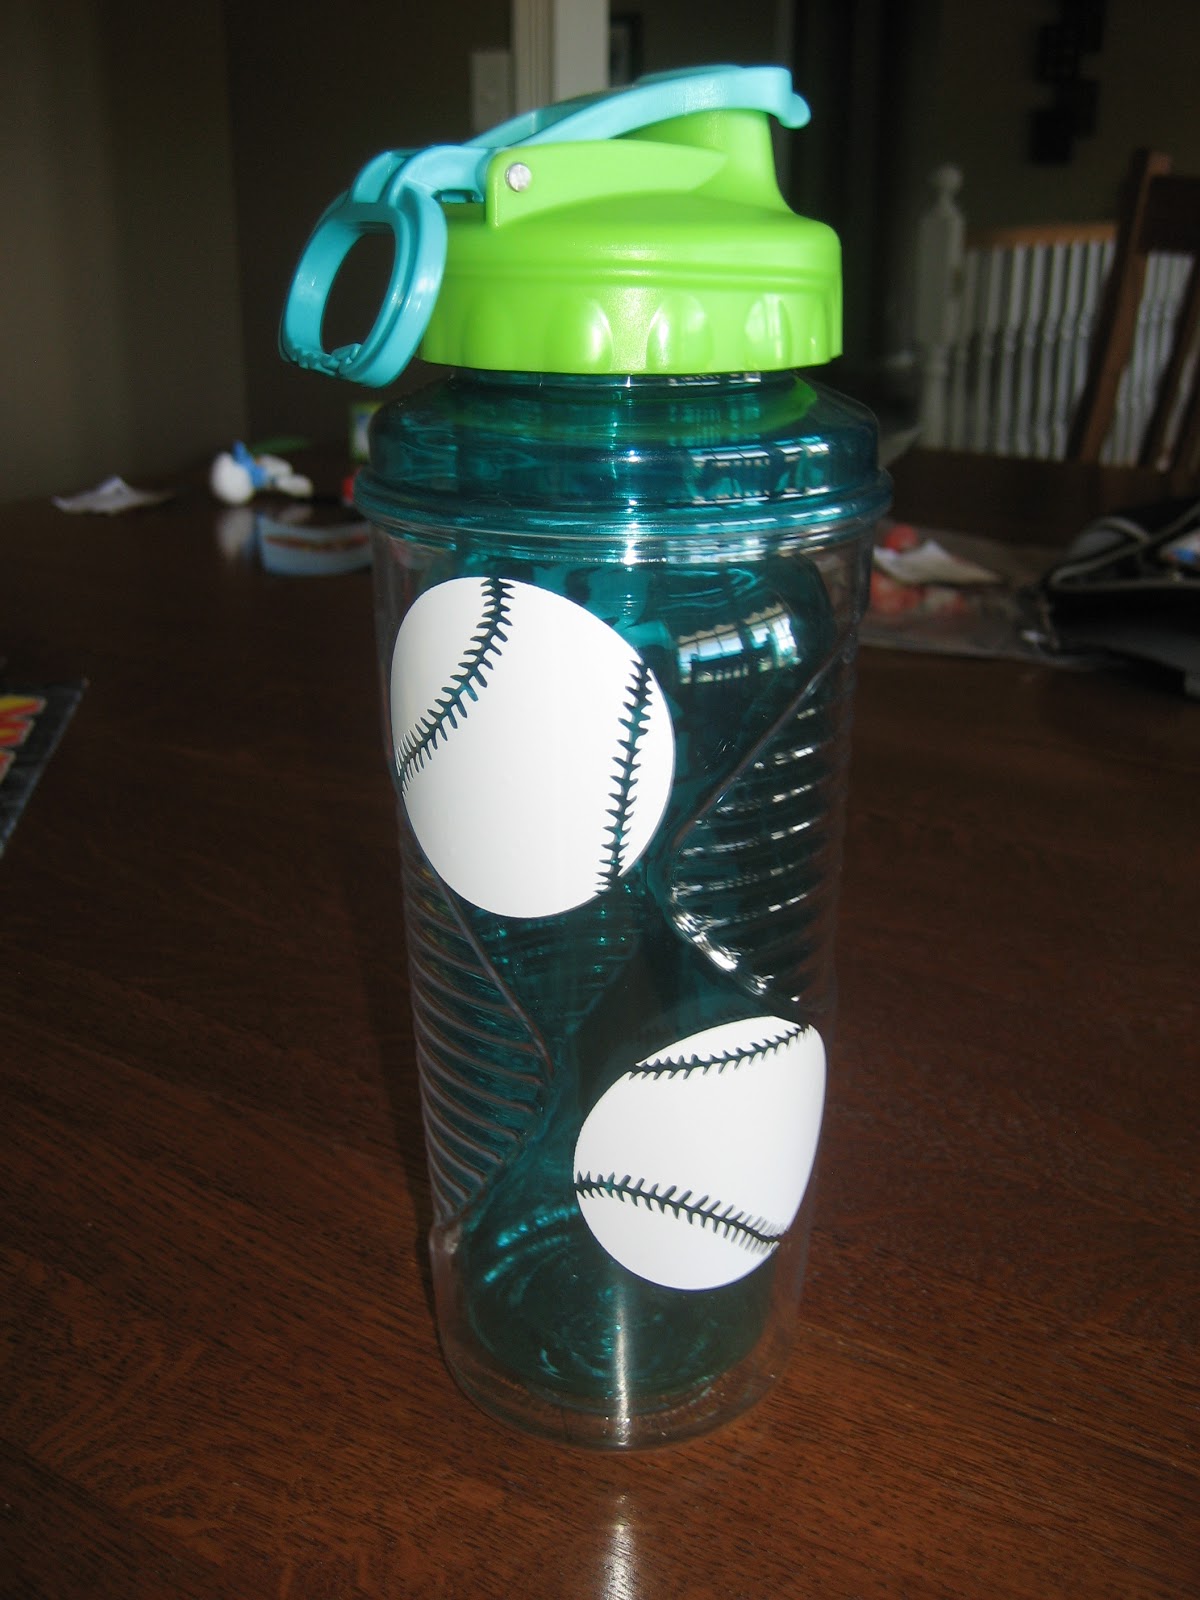
Below is Brady's new water bottle which I added a couple baseballs to it and the bottom his pencil box.
And finally here is Brady checking out his new desk at the School Open House just a few days before school starts.
When looking at the required school supply list, every item required the students' names on them in permanent ink. I'm fine with doing that for the boxes of crayons, glue sticks, etc... but when it came to my son's pencil box and water bottle I wanted to make it a little more special for him. Again, just a very simple project but by just adding his name in vinyl instead of permanent ink I think the items look much nicer! And...even though there is only "one" Brady in his Kindergarten class, my son still insists on being called "Brady M" which was his name in preschool since that class did have more then one Brady in it! He is very adamant of this name as we even have had to put that on his Birthday cake, cards, signs for his bedroom, etc...
Below is Brady's new water bottle which I added a couple baseballs to it and the bottom his pencil box.
And finally here is Brady checking out his new desk at the School Open House just a few days before school starts.
Enjoy the Simple Things...
Let's just say this tile was anything BUT simple! I have made this design in one color on a 12 x 12 tile and I don't remember any headaches with that one. When shrinking down the design and placing it on an 8 x 8 tile, I ran into all kinds of problems! The fonts were too skinny on just a few of the letters so some of the letters would be literally cut off. Then I changed the width of the problem words but, again, the letters are cut off....I tried changing fonts but couldn't find any fonts that I liked. In the end, it finally worked but I did waste a ton of vinyl in the process! And I also secured the letters with a layer of modge podge just to ensure nothing would be accidentally rubbed off as I was not going to do this sign on this size of a tile EVER AGAIN! : )
I do like how the 2 different colors (burgundy and black) worked on this brownish/reddish tile. It will be placed in a kitchen on a black marble counter top and the kitchen itself also has red accents throughout. I hope they like the color choices anyway or, if not, they will have to be "ok" with a bigger tile for the sign! Realistically looking at the sign you wouldn't expect too many problems but it was just one of those tiles that you just make once!
Calling All Quilters!
This new tile is perfect for the people who love to Quilt! The design is a modification of a wall saying I have done previously that said, "My husband lets me have all of the Scrapbooking supplies I can hide" to the following 12 x 12 tile which is completed in dark brown and burgundy!
Golf Cart - Vinyled
How do you find your golf cart among the hundreds of others that are stored at the golf course? Sure, you may have your own "parking spot" but if anyone is like me, I would easily forget where that "parking spot" is. The solution is to personalize it with your own name and stick figures!
This isn't my golf cart....since having kids I can count the number of times I have golfed on one hand! But, I do know these clients "very well" and they now have their own custom designed, personalized golf cart!
The picture is not the best and you will see the reflection of the camera taker (which is not me either!) but you will be able to see the newly designed sign personalized right on their hood of the golf cart! It's hard to tell by the picture but the golf cart is brown and the vinyl is a beige. Now, there will be no confusion on who owns this golf cart!
This isn't my golf cart....since having kids I can count the number of times I have golfed on one hand! But, I do know these clients "very well" and they now have their own custom designed, personalized golf cart!
The picture is not the best and you will see the reflection of the camera taker (which is not me either!) but you will be able to see the newly designed sign personalized right on their hood of the golf cart! It's hard to tell by the picture but the golf cart is brown and the vinyl is a beige. Now, there will be no confusion on who owns this golf cart!
Ceramic Pig Vinyled
I have seen pictures of ceramic pigs decorated in tu-tus, baseball caps and other themes and always wanted to decorate a pig myself. I planted this idea as a baby gift to one of my good friends a few months back as I had no need for a decorated pig in my house. And just a few days ago my friend shows up at the door with a big, white ceramic pig and tells me to decorate it! And she needs it quickly! : )
In the end, this was a fun project but it started out poorly! The baby girl's name is "Elliana" and we chose to put her name over the monogram "E" on the 2 sides of the pig. Let's just say I learned about every possible thing "NOT" to do on the first side but after numerous failed attempts I figured out how to align up the "E" and layer the name while keeping everything straight. It's the curvature of the pig that makes everything difficult! So when I went to put the name on the second side, it took just a few minutes to line everything up and in just one try!
After the names were in place I cut out butterflies and flowers in different sizes and colors and small squiggly lines. My friend found out what colors the baby's room was and we chose matching colors from that. The orange bow on the top of the pig also comes from the colors of the baby's room. When all of the smaller embellishments were cut I chose to have my friend help me put the decorations on the pig. This turned out to be a very fun project as she chose the placements of the vinyl and put nearly all of it on the pig. In the end, I loved how this pig turned out! Meet Elliana's New Pig!
In the end, this was a fun project but it started out poorly! The baby girl's name is "Elliana" and we chose to put her name over the monogram "E" on the 2 sides of the pig. Let's just say I learned about every possible thing "NOT" to do on the first side but after numerous failed attempts I figured out how to align up the "E" and layer the name while keeping everything straight. It's the curvature of the pig that makes everything difficult! So when I went to put the name on the second side, it took just a few minutes to line everything up and in just one try!
After the names were in place I cut out butterflies and flowers in different sizes and colors and small squiggly lines. My friend found out what colors the baby's room was and we chose matching colors from that. The orange bow on the top of the pig also comes from the colors of the baby's room. When all of the smaller embellishments were cut I chose to have my friend help me put the decorations on the pig. This turned out to be a very fun project as she chose the placements of the vinyl and put nearly all of it on the pig. In the end, I loved how this pig turned out! Meet Elliana's New Pig!
Subscribe to:
Posts (Atom)