Welcome to my Website! In addition to creating and selling my products, I love to try new ideas, many of which will be showcased in my blog found on the Home page! Check back often for new blogs and new items I will have for sale! Need something designed but do not see it in my catalog listed under the Vinyl Templates tab? I can custom design nearly anything, please contact me and we may be able to create a wonderful product based on your ideas! -- Cindy
Showing posts with label Subway Art. Show all posts

Kitchen Aid Mixer - Subway Art

I love Subway Art and recently came across a wonder blog, called "A Little of this, a little of that" and the topic I read was about Subway Art. And the lady, Sarah, designed a file using Subway Art specifically for her Kitchen Aid mixer! The finished designed was awesome and I was able to get the file from her!

This is my boring Kitchen Aid mixer.


And this is my Kitchen Aid mixer with dark red Subway Art!


And these are my two little bakers using the newly decorated mixer!


Christmas Subway Art with Canvas

With Christmas arriving very soon, I have many gifts to make and orders to fill. I really like the look of Subway Art and wanted to make something special for my son's Kindergarten teacher. While looking online for ideas I came across the Crafty Sweet Peas blog and the perfect Subway Art file! I normally design my own but after seeing how nice this design was I went ahead and purchased Barbara's file.

I painted a 11 x 14 canvas a Santa Red and then used white vinyl. And this is my finished Subway Art canvas!


The canvas above was completed with indoor, non-glossy vinyl. I really liked how it turned out and with the vinyl sticking so well on the painted canvas I could have just quit here. But I wanted a shiny finish so I covered the canvas with 2 coats of Modge Podge to achieve the following glossy finish.


It may be hard to see the glossy finish in the pictures but if you could see it in person, there is truly a big difference. And Special Thanks to Barbara Sweetpea from Craft Sweet Peas for the file and for her genuine and thoughtful emails in regards to my project, the file and everything else!

Cindy

Christmas Subway Art

In an earlier post I talked about the first ever Christmas Cookie Exchange Party I co-hosted. In that post, I needed to make some prizes for several contests we were having at the party. My first prize was a Christmas Subway Art picture frame that I designed. The supplies I needed was a large picture frame, blue poster board and white spray paint. I went to my local Goodwill store and found a picture frame for $3, the Dollar Store had a big sheet of light blue poster board for $0.50 and then my husband picked up a bottle of satin white spray paint at the hardware store. This is what I started with:


And this is my finished product!


Normally, when I vinyl picture frames, I cut the vinyl in "reverse" and then place the vinyl on the backside of the glass. This way you can easily clean the front of the glass and not worry about putting any cleaning spray on the vinyl. But, this time I placed the vinyl directly on the blue poster board. I really didn't notice much difference in the end result by doing this. My other reasoning behind this was that you could easily change out the poster board and add other subway art designs for other seasons. I could make a red subway art sign for Valentine's Day or 4th of July, etc... and can re-use the same frame.

Anyway, I found the original idea of the Christmas Subway Art on Etsy and the person was selling just the vinyl for $20. For under $5 I not only have the Subway Art vinyl but the entire frame by using a little spray paint, checking out Goodwill and the Dollar Store and using my Cricut!

Cookie Exchange Party

I know it's been awhile since my last post but with a very busy Thanksgiving weekend and the holidays quickly approaching, time is going by way too fast! One of the activities that I have been working on for the holidays is a Christmas Cookie Exchange party! The last two weeks I have spent quite a few late lights, along with my best friend who co-hosted the party with me, making prizes, establishing a set of "rules", creating decorations, baking and everything else that a successful party requires! The "rules" was my favorite part of the party, this was needed to ensure that all cookies were "baked", everyone came with a minimum number of cookies, everyone had an ugly Christmas sweater and most importantly, no kids or husbands came to the party! This was a Cooke Exchange Party, but it also was a fun night for just the ladies!

This was our first attempt at such a party and is now going to be an annual tradition. Including us (the two hostesses), we had a dozen people at the party with nearly 40 dozen cookies plus plenty of appetizers and drinks. The picture isn't the greatest but here is the table with all of the cookies the ladies brought to the party!


We also had prizes for 3 categories which was the Best Looking Cookie, Most Creative Recipe and the Ugliest Christmas Sweater. We obtained a copy of each recipe ahead of time, made copies and handed them out at the party so everyone went home with a recipe of all of the cookies at the party. And this allowed everyone to vote for the "Most Creative Recipe". I should have taken pictures of the winners of each category, especially the "ugliest sweater". It may be too late for that, but I do have pictures of the prizes that I made for the party. Each prize was made out of vinyl and I think turned out great! The Red Vinyl sign is made out of tile, the Subway Art Sign was a Goodwill frame that I re-painted, both of which I will post a separate blog on how I made them in more detail!


I wrapped up all of the "prizes", we placed them under the Christmas tree and the winners unwrapped their presents to reveal their prize! I hope everyone had a lot of fun and I think, come next year, there will be very little things I would want to change when it comes time to prepare for our "2nd Annual Cookie Exchange Party"!

Valentine's Day Subway Art Sign

It has been far too long since my last blog so I decided to design a "BIG" sign to make up for me past absenteeism.  I love doing Subway Art and wanted to incorporate that for Valentine's Day.  My goal was to create a 2 x 4 foot Subway Art Valentine Sign that will be displayed outside on our front porch!

This was truly a family project as my husband cut and painted the sign and then my 2 boys helped me place the vinyl onto the sign and also to keep the room free of garbage while working on our big project.  When finished my husband will seal the sign to protect it from the winter elements that I think nearly everyone is feeling right about now!

The pictures below show the sign with a fresh coat of red paint and then my design laid out in pieces!  This is when I wished I had a big industrial sign that would just do everything for me!


The next group of pictures shows my 2 boys helping by keeping the excess vinyl backings off of our project and even placing vinyl on the big red sign!  My 4 year old is very patient and can do the easy signs although I will line up everything for him.  The 2 year old also did a great job but is not quite as "careful" as I would like him to be!  : )  But they had a blast and so did I!


And now here are pictures of the sign in different phases of completion:


And finally the sign is Complete!


Once my husband seals the sign to protect it from the Winter Elements and hangs it outside on the front porch I will update the Blog with the final picture!

Cindy

Outdoor Halloween Sign

After creating an 18 x 18 Tile originally intended for my front porch but now afraid it would be too easy to have someone walk off with it - I needed to make a "BIG" Halloween Sign that can be attached over the railing on the front porch! 

I started with a 4 foot by 2 foot piece of wood and painted it orange and then went designing!  I based it off of the very popular Subway Art themes that I have seen on numerous other blogs and a few that I created myself.  I kept the main color as black but then added some white, grey and red vinyl for a more dramatic touch.  When finished we sealed it with modge podge and then added several coats of a urathane finish to provide a super glossy finish and will protect the sign from rain and the snow that will be arriving way too soon for me!

And here is the sign on our front porch! 


Cindy

Subway Art - Church Canvas Signs

Just recently I had the opportunity to create some signs for the church that I grew up in.  Several groups came together to makeover the Sunday School rooms and the hallway.  Many volunteers spent several weeks cleaning out years worth of clutter, painting the rooms and adding new decorations. 

I was asked to design 3 vinyl wall signs and 2 Subway Art signs.  Pictured below are my 2 Subway Art Signs that went into the hallway leading to the Sunday School rooms.  I painted the canvases in a mustard color with black vinyl and then coated with a high gloss acrylic paint to seal the letters and to provide a glossy finish.  The first canvas is of the 10 Commandments designed for kids and the 2nd canvas describes the church in the kids' eyes.  The picture doesn't reflect the deep rich mustard color but still shows how the canvas was created.


I also designed the "Jonah and the Whale" sign pictured below.  Another person graciously painted the mural below my sign.

The next two vinyl signs I made for a second Sunday School room.  Another person also came in and did an awesome job painting the mural!


From what I hear the kids loved the new rooms and I was very glad to be able to help out in their "makeover"!

Cindy

Subway Art - Outdoor Tile

I designed this tile awhile ago and just recently received a picture of it displayed outdoors.  I really like how the finished tile turned out so I thought I would share it.

I normally finish 12x12 tiles for indoor signs but was requested an 18x18 outdoor Welcome sign.  The person requested "welcome" and various other sayings in different languages to be randomly displayed on the tile in random fonts.  Having an 18x18 tile to work on gave me more room to play and I think it turned out quite well.  My finished product is below:


Cindy

Subway Art - Halloween Tile

I have not been able to Blog as often as I want as I'm trying to put the finishing touches on this brand new website and also complete some vinyl signs for other people. 

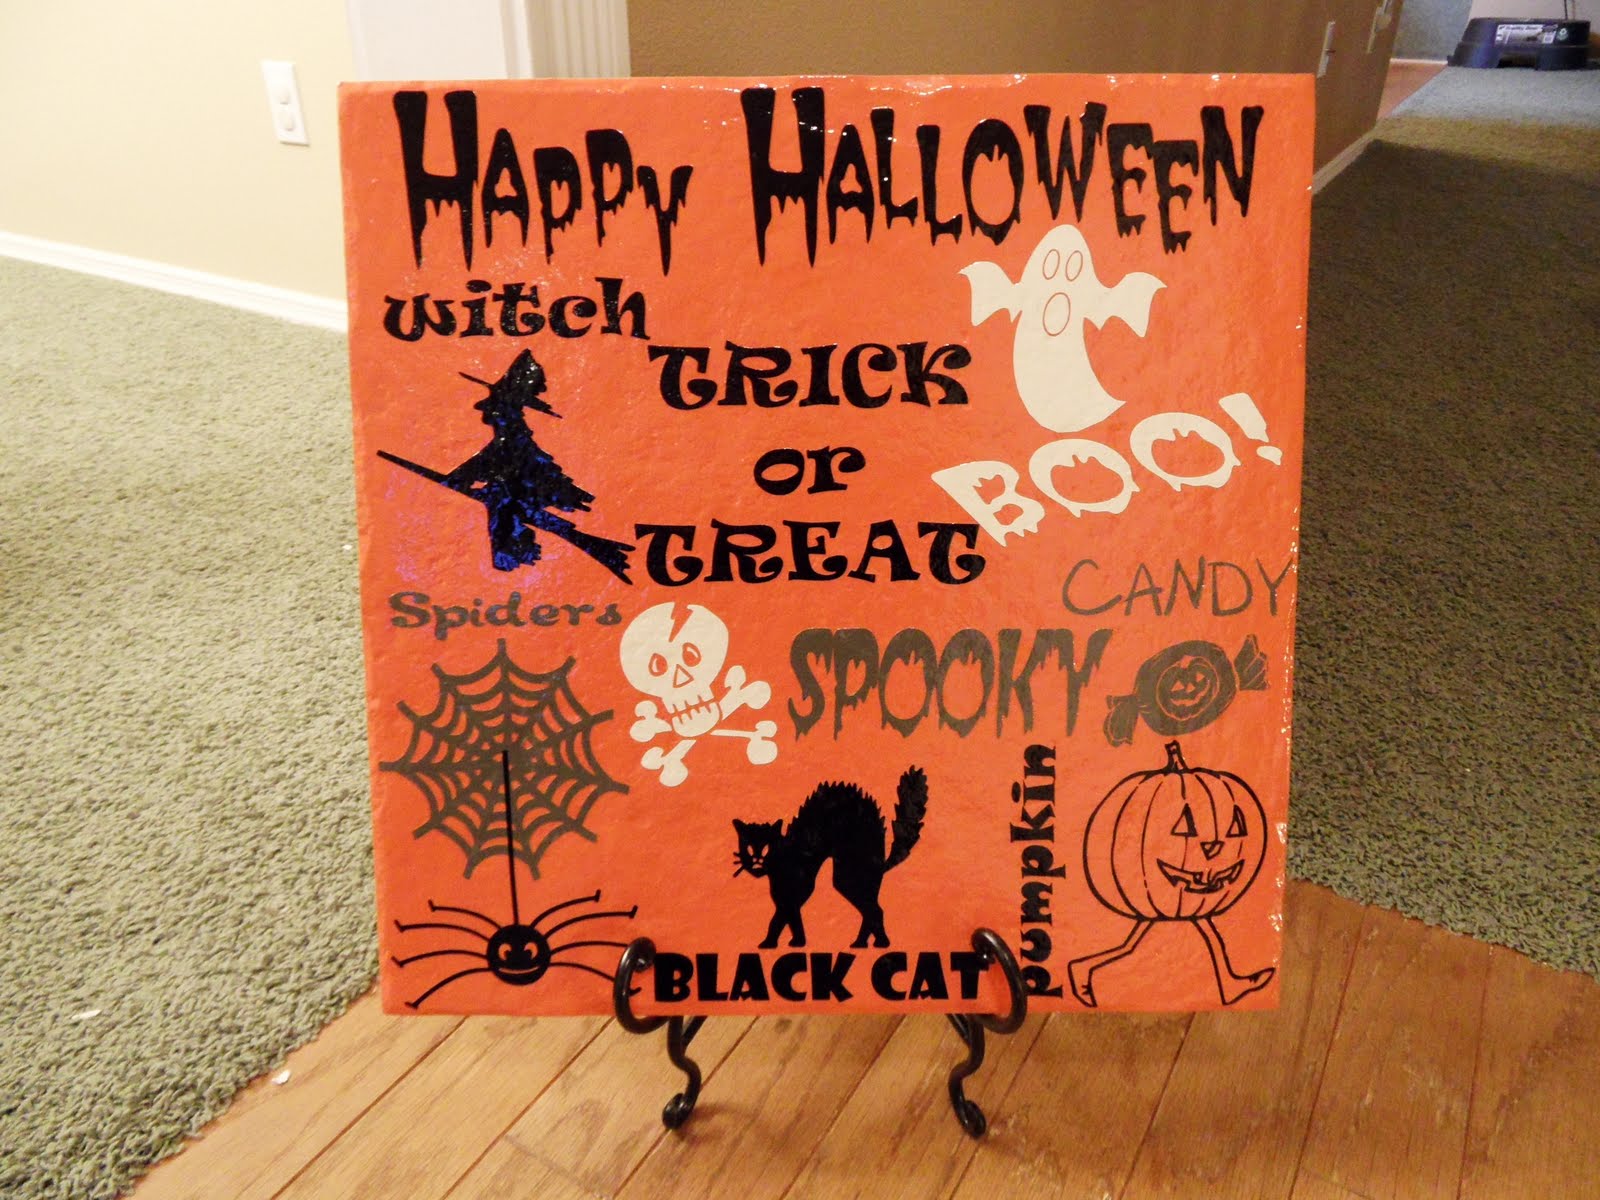
In my spare time, I did test out a new idea and created a nice Halloween sign from an 18x18 tile.  I found some Halloween Orange Acrylic paint on sale at Hobby Lobby and used that for my main color.  I then based the idea off of some previous Subway Art signs I made and created a Halloween sign with words and pictures and even used different colors of vinyl. 

Originally I wanted this as an outside sign but am now afraid that maybe it would be too easy for someone to remove from my front porch so am displaying this for everyone to see once they walk into my front door!  Because this was going to be an outside sign I covered the finished tile with several coats of a clear water-based urathane to protect the vinyl from the outside elements and to provide a nice, glossy finish! 

(the witch's blue effect is from the camera flash)

I really liked how this Tile turned out!  And  because I still really want something for the outside I have a brand new idea for the front porch that I am hoping to try out very soon!  I have already bought some wood that is 4 feet wide by 2 feet tall and will be painting it and creating a much bigger Halloween Sign.  Check back soon and hopefully that project will be completed with pictures to share!

Cindy

Subway Art - Playground Rules

After successfully making Subway Art on Canvas I decided to try cork board.  A few months back I picked up a framed cork board at a garage sale for a couple dollars but never really knew what I would do with it until now!  I spraypainted it black and found it would fit perfectly by our basement back door which leads to our back yard.  I came up with a list of rules specific to our back yard and my boys' needs and went designing.  I did each line in a different font, laid out the rules in alphabetical order and used white vinyl to complete the sign.  I did not spray any gloss or seal over the final product so I could easily remove a "rule" as the boys outgrew them and may need different rules down the road.  If this was displayed outside then I would have used some sort of acrylic spray to seal and protect the letters.  Here is my finished product!

Subway Art with Canvas

After seeing many different types of Subway Art either sent to me by friends or viewing other people's blogs I decided to try it out. I bought 2 canvases - painted them the same yellow that is on another wall in our family room and dedicted the 2 pieces of art to my 2 boys. The first canvas describes my oldest son, Brady, all of his characteristics, his Birthday, places he lived, favorite hobbies, etc....

 
The second Subway Art is of my 2nd boy, Kevin.
 
And here is our finished wall that has been bare since we moved into the house over a year ago!