Welcome to my Website! In addition to creating and selling my products, I love to try new ideas, many of which will be showcased in my blog found on the Home page! Check back often for new blogs and new items I will have for sale! Need something designed but do not see it in my catalog listed under the Vinyl Templates tab? I can custom design nearly anything, please contact me and we may be able to create a wonderful product based on your ideas! -- Cindy
Showing posts with label Vinyl. Show all posts

Pickleball...Pickleball...Pickleball!!!!!!!

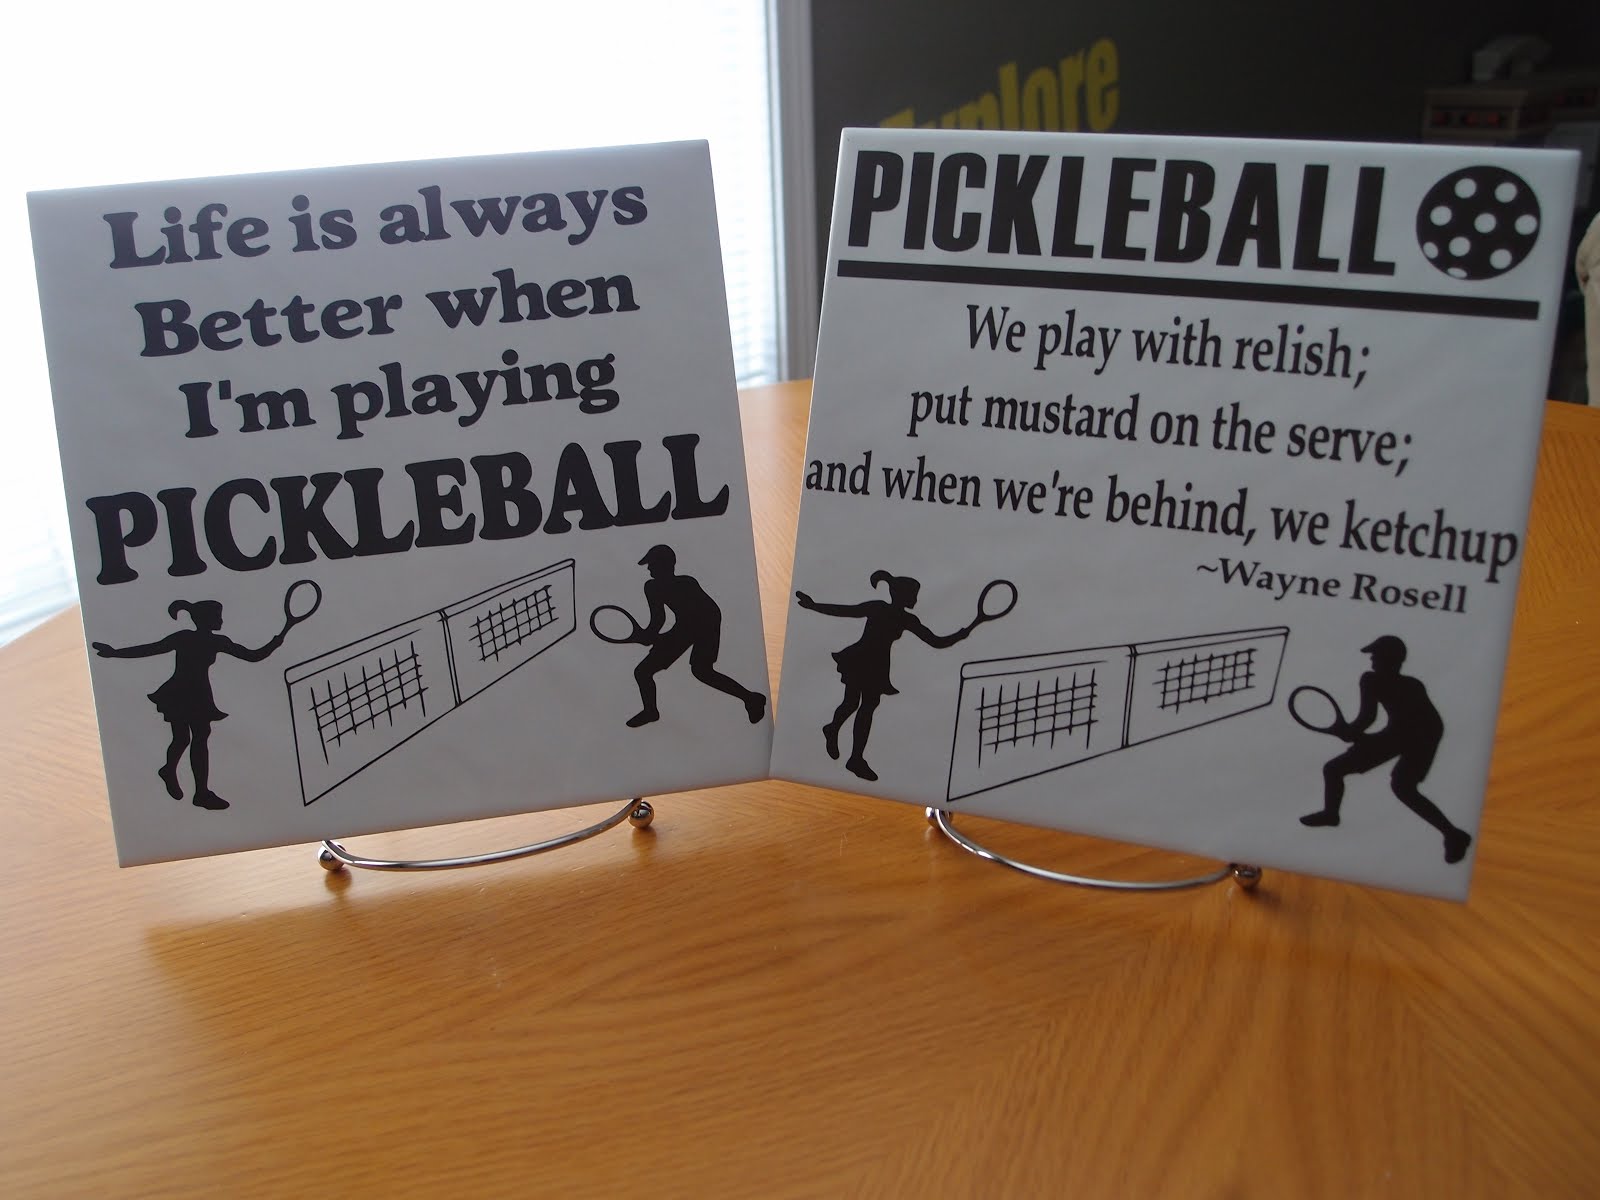
Pickleball is the Fastest Growing Sport in America! What better way to show off your love for Pickleball then with a Custom Vinyl Pickleball Tile! 


 These tiles are available in 6x6, 8x8 or 12x12. Currently I have 7 different designs available for sale with a couple more designs soon to come. If you want a different saying on one of these tiles, please let me know and I can create it! These tiles will be in a light tan or white color depending on what tiles I have in stock. The vinyl will be in dark brown unless if you state in your order you would like a different color. My current designs are shown below:


The prices for these tiles is listed below:

 $10 for the 6x6 Tile 
$12 for the 8x8 Tile 
$20 for the 12x12 Tile 

Shipping is extra but I will do my best to ship at the lowest cost possible. I will provide discounts when ordering multiple tiles so please contact me here for a price quote or any questions you may have!

 Thank you!

 Cindy

Coffee mugs - Vinyled

In a previous post I personalized 2 coffee mugs to give as Christmas presents and now I have more to show off!

I used the same dark red mugs with a dark brown on the inside that I found from Walmart. The front of the mugs has the individual names and then I used a different coffee design for the back of the mug. The coffee sayings and designs I found online from Laura which was on her blog, The Alliance Trader.

The pictures below show the new coffee mugs.


The next coffee mug is a gift to a hair dresser. The saying on the back says "I'm a Beautician not a Magician".


The front of the cup has the person's first name on it just like all of the other coffee mugs. Here is a picture of some of the mugs together!


I hope all of you had a very Merry Christmas and a Happy and Safe New Year!

Picture Frame - Vinyled

This project was a fun project to complete as I haven't worked much with flowers and picture frames and I knew who was the intended recipient of the gift. I did make the "giver" sit at my computer and pick out the flowers, the sizes and the colors as she had a "vision" and I didn't want to change that. I also had her put the flowers on the frame.

We started with a nice frame from Target.


I then added the saying on the top that said "Friends are flowers in the garden of life." and the bottom of the frame I added the names "Grace and Olivia". The two girls are best friends and have been in daycare together since infants and now are in preschool together! Now the frame is starting to look pretty nice.


After the flowers were picked out and cut, my part was done. I wanted the "giver" to put on the flowers in the design she wanted to not interfere with the most important part of the project that you will see in a little bit. Since we are putting the flowers on the back side of the glass, I cut the designs in reverse and pointed out to put the flower on first, then the stems to ensure the layering looked right from the front.

And now the frame looks like this!


And now with the final piece completed, we have a very nice collage of pictures of the two little girls from babies to nearly 4 years of age!


I love how the project turned out and on how creative my friend is to come up with this project all by herself!

Cutting Board - Monogram

A few weeks ago my husband asked me for glass cutting boards for Christmas. It makes sense as I have made quite a few glass cutting boards for other people but yet we have really old cutting boards that are probably filled with bacteria as they have scratches and cuts all over them. So I figured, if he wants new cutting boards then I am going to decorate them with some vinyl.

And if my husband is reading this and it's BEFORE December 25th, please click the "X" in the upper right hand corner of this page as you are to stay off of this page until AFTER Christmas! :)

This project was much harder then I anticipated as I wanted to do something different. And since I haven't really worked much with arches and putting text on circles, I spent a considerable amount of time learning this task instead of just designing. The program I use isn't the easiest for doing this either which does not help at all. Then to make things more difficult I wanted to have two colors on the cutting board and trying to layer that was a little tedious. In the end, I was able to make things work and it was definitely worth any frustrations I may have experienced.

The picture below shows the design cut in two pieces based on color.


Notice I also had to cut the items "flipped" as I am putting the vinyl on the backside of a glass cutting board. I won't mention how many times I have forgot to do this important step and had to throw away a complete sign, typically after I weeded out all the excess vinyl before realizing the sign is actually backwards! Or I actually remember to flip the sign but then use "indoor" vinyl instead of "outdoor" vinyl. Indoor vinyl will not stand up to water and then I end up with ANOTHER sign to throw out as it's flipped and won't work for most other projects!

The next picture shows the red sign now layered on the black sign with transfer tape on. This step is hard as you have to line it up right the first time or you will start all over by cutting a brand new sign....there is no "redo" button!


Now the next picture shows the vinyl on the cutting board. It still looks backwards because we are looking at the cutting board from the underside of it. This is where I place the vinyl so you do not actually cut on it, it shows through the glass to the front.


And now when looking at the glass cutting board from the top of the board, we have the finished product!


I love the 2 different colors on the cutting board! Hopefully, my husband will like it too!

Kitchen Aid Mixer - Subway Art

I love Subway Art and recently came across a wonder blog, called "A Little of this, a little of that" and the topic I read was about Subway Art. And the lady, Sarah, designed a file using Subway Art specifically for her Kitchen Aid mixer! The finished designed was awesome and I was able to get the file from her!

This is my boring Kitchen Aid mixer.


And this is my Kitchen Aid mixer with dark red Subway Art!


And these are my two little bakers using the newly decorated mixer!


Personalized Coffee Mugs

My youngest boy is in his first year of preschool and loves it! There are 20 kids in class with 2 teachers and after each class Kevin is bragging about what they learn, the snacks they ate and every other little detail of class. With Christmas coming, I wanted to give a small gift to the two teachers and decided on this:


Ok, I am not going to just give one coffee cup as a gift where they must take turns using it...that would be a little cheesy (and cheap!). I picked up two of these coffee cups and then turned to my ever loyal Cricut to dress it up a bit. I first started with their names.


Just adding the names makes the cup look a lot better (and not so cheap!). Then I found a coffee saying online from Laurie at her blog, The Alliance Trader. Now my cups looks like this!


I haven't decided what yet, but I will fill up the cups with some yummy treats, add our family Christmas card and have my son give his teachers their present at their Preschool Christmas party. The project was very simple but I'm hoping adding a little bit of vinyl makes a nice, personalized touch for the teachers.

Cindy

Christmas Ornaments

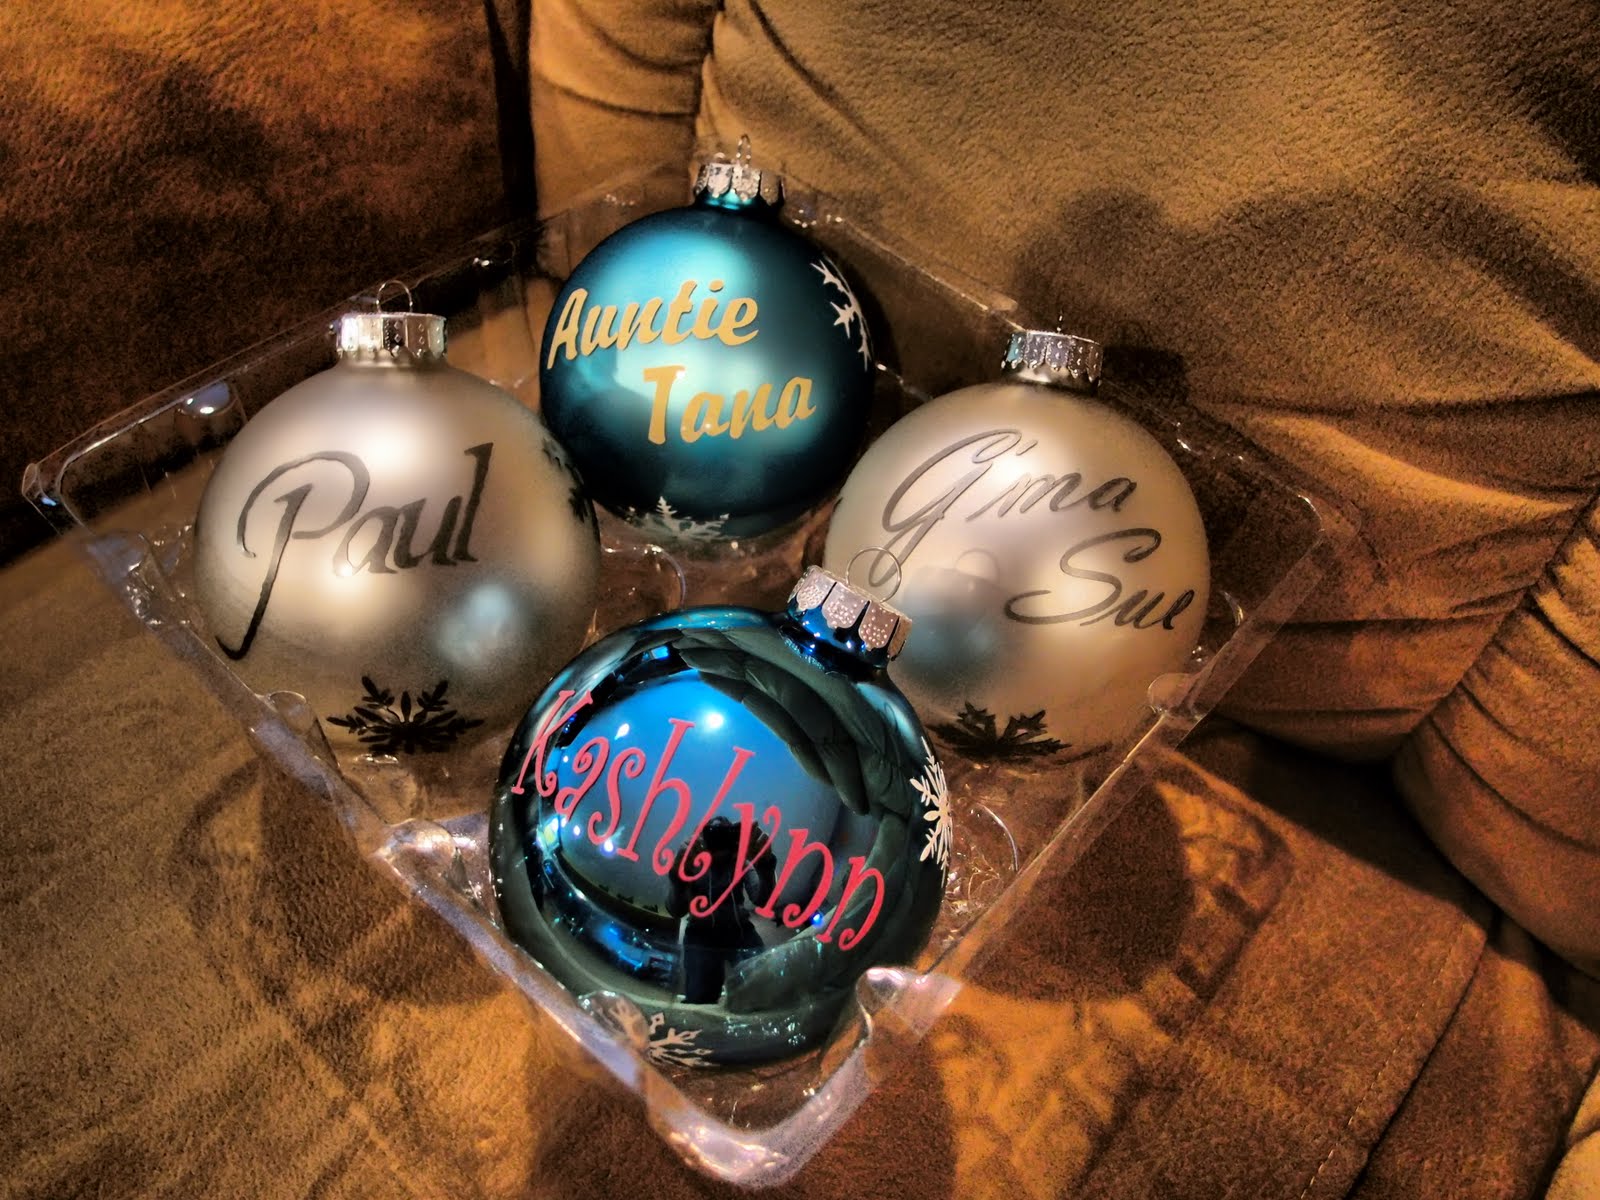
Christmas ornaments are fun to make and very popular. Each ornament has a name on the front and then 3 or 4 snowflakes around the ornament. Last year I made a bunch and now have a few more to show off. It is very difficult to take decent pictures of these (or maybe it's just me) so I apologize ahead of time for the quality of the picture. In person, the ornaments look great!


And here is another example of the one set of ornaments. I have a new camera so am trying different settings to see how things turn out!

Cutting Board - Bon Appetit!

I have done several cutting boards in the past and am now receiving more requests for these with Christmas almost here. This is a new design that I have for the cutting board and I think it turned out great!

I used outdoor, dark brown vinyl on a 10 x 15 cutting board. I cut the image in reverse and placed it on the backside of the cutting board. So it's safe to cut, safe to wash and you have a nice picture to look at or display while using the new cutting board!

Christmas Subway Art with Canvas

With Christmas arriving very soon, I have many gifts to make and orders to fill. I really like the look of Subway Art and wanted to make something special for my son's Kindergarten teacher. While looking online for ideas I came across the Crafty Sweet Peas blog and the perfect Subway Art file! I normally design my own but after seeing how nice this design was I went ahead and purchased Barbara's file.

I painted a 11 x 14 canvas a Santa Red and then used white vinyl. And this is my finished Subway Art canvas!


The canvas above was completed with indoor, non-glossy vinyl. I really liked how it turned out and with the vinyl sticking so well on the painted canvas I could have just quit here. But I wanted a shiny finish so I covered the canvas with 2 coats of Modge Podge to achieve the following glossy finish.


It may be hard to see the glossy finish in the pictures but if you could see it in person, there is truly a big difference. And Special Thanks to Barbara Sweetpea from Craft Sweet Peas for the file and for her genuine and thoughtful emails in regards to my project, the file and everything else!

Cindy

Ceramic Pig - Vinyled

Today is a great day! My Christmas present came early and I am trying it out for the first time on my newly vinyled Ceramic Pig! I have many new settings and upgrades on this camera and that may be reflected on the upcoming posts as I'm trying to figure out how to use it!

Anyway, I just finished a special baby gift by using vinyl, a hair bow and a ceramic pig. I chose two different shades of pink for the main colors and a pink bow...can you tell the baby is a girl?!!?!?

Below is my finished product!


Halloween, Halloween, Halloween!

I am a little sad that Halloween is over. Other then the Halloween luminaries I made in an older post, I did not have time to create any new Halloween decorations but I had a blast celebrating Halloween with my family and friends!

Halloween actually started the Thursday before with a party at my son's preschool. My son dressed up as a Presidential Candidate for the 2012 election. We found this idea from this site and then we also handed out party favors to each student in the preschool class. The party favors were mini frisbees with a sticker on the inside that said "Vote for Kevin!" and a sticker on the outside that said "Kevin 2012". Of course, we had stickers on Kevin's shirt, a big button on his jacket and a big campaign sign. Kevin was the best looking Presidential Candidate thus far, but you will have to wait until later in the post to see his costume.

Then on Friday, we had a Halloween food day with my best friend and her two kids. This is what the kids had for lunch!


My friend, Renae, made the jack-o-lantern fruit cups and the Frankenstein pudding cups; however we had the kids make mummy pizza. All of these ideas she found off of the Internet! Here are a few pictures of the kids having fun making their own pizzas and eating the food!


The mummy pizzas were very easy to make. We had English muffins, pizza sauce, mozzarella cheese (pulled apart and laid across the muffin) and black olives for the eyes.

After lunch we prepared the gingerbread (made out of graham crackers) houses so that when my 5 year old came home from school we can then make spooky haunted houses! The kids chose what color(s) they wanted and we had tons of candy for them to decorate. Below are a few of the pictures from this messy but very fun project!


The weekend consisted of baking 5 dozen pumpkin chocolate chip cookies and 3 dozen ghost cookies. The kids helped with all of this! And prior to Halloween weekend we carved jack-o-lanterns, roasted pumpkin seeds, attended HarvestFest, made spooky foam pirate ships, and even visited a Nursery to paint pumpkins. With everything we managed to do prior to Halloween, I cannot imagine how much fun Christmas and preparing for Christmas is going to be this year!

When Halloween actually arrived, the kids had 2 Halloween parties to attend plus lots of trick-or-treating! As I said before, my 3 year old is a Presidential Candidate. What did my 5 year old decide to be? A School Crossing Guard! I can honestly say they both changed their minds on a dozen different Superhero costumes and many other ideas but when I convinced them that we should be "different" these ideas stuck almost immediately with them. Brady loves the Crossing Guard because he sees one at school every day and she "protects" the children. It didn't take long for my 3 year old to realize that the President "protects" people too. So, meet my "protectors"!


And out of this entire post, we do have one vinyl project out of this! I made the "stop sign" out of vinyl! :)

Custom Vinyl Plaque & Other Vinyl Sayings

A good friend of mine that I still keep in contact with even though we now live many states away and have not worked together for over 7 years now had several requests for vinyl sayings. She is so good at finding bargains and turning old, out-dated items into new, one of a kind, awesome art pieces. I wish I had her eye and imagination to do the same for in my house!

One of the requests my friend had was to make a square sign that said "YOU CAME ALL THIS WAY MIGHT AS WELL COME IN" in brown vinyl. I made the sign where each line was a different size but all the same font and a perfect rectangle. My friend found an old plaque that was literally covered with pilgrims, sanded it down, painted it and roughed it up to provide an antique finish. When all done, my vinyl saying was applied and this is the final product!


I love how the sign turned out!

My friend also needed in brown vinyl, a saying of her last name "Ayala" and another that said "Once Upon a Time...". She used these sayings to complement a gorgeous wall filled with family pictures and other pieces of art.


Like I said...I wish I had her imagination and eye for decoration!

Super Hero in Training - Custom Canvas

I am STILL working on my son's Super Hero room and came across a perfect idea that would fit right next to my son's bed. The idea was great, the cost was way too expensive so I made my own!

From Red Envelope I ran across this canvas which starts at $79. I decided to take one of my 16 x 20 inch canvases (bigger then the $79 finished product) that I purchased for under $5 at Michaels and started from there. Even though the canvas is already white, I decided to add several coats of white paint on it. The paint adds extra texture and I wanted the canvas to have a brush stroke effect where you could see brush strokes when looking at it from different angles. I then added one coat of Modge Podge to give a glossy finish AND to add more texture. This will make it easier to attach the vinyl onto the canvas. I do have a little secret up my sleeve which is the best idea my husband has ever had! It is this!


I know it doesn't look like much, but this is a piece of drywall that my husband cut to fit perfectly inside the back of the canvas. You could use any type of wood or board, we just have tons of extra drywall in our garage so my husband used that. By having this inside the back of the canvas you do not have any sag when applying the vinyl to the front of the canvas. It's now as solid as a hard cover book or a table.

Now that my canvas is painted and prepped to add vinyl, I needed a special logo. I could use Captain America's logo which is what is shown on the Red Envelope site, but I have that sign further down the wall where I want to put this canvas on. I searched the Internet for ideas and found the perfect solution! From The Lady Wolf's blog I found this set of files that had the perfect Super Hero logo for my son! This is the Superman's logo but instead of "S" for Superman, I can replace it with "B" for my son's name. My canvas now looks like this!


The 2 red lines are just markers as I layered my image prior to putting it on the canvas. I also need the markers to line up the text on the bottom half of the canvas. I now followed the same theme as Red Envelope for the bottom half of the canvas. I used red and blue for the bottom half as that is also the same colors for Superman.


The picture above shows the bottom half lined up by using the markers and taped on. After taking the transfer tape off and removing the temporary markers, we have the finished product.


At this point, all I did was add one more layer of Modge Podge to secure the vinyl on the canvas. I also did this because I used glossy vinyl for the red but the blue and the yellow had a matte finish. After using Modge Podge, the entire canvas now has a glossy finish. Here is the canvas in my son's Super Hero room!


Excuse the top of my son's head in the picture, I was tucking him in for bed and didn't see he made it in the shot! But...for literally pennies on the dollar I love how my son's new canvas turned out! And if you like Super Heroes then please check out the rest of the blogs in October as nearly all of them are about Super Heroes!